
Head brewer Erik from Geipel brewery described his decoction mashing process, we decided to put this into practice on the Grainfather and spoke with JK about how and why we should be doing a decoction mash when homebrewing lagers. Read his thoughts below:
Decoction mashing originates from a time where malt was under modified and accurate temperature measurements were difficult to obtain, decoction mashing was developed to get the best out of this under modified malt by drawing off parts of the mash (say 30% or so) and putting it through separate temperature steps that end in boiling the part of the mash you’ve drawn off. This is then added back to the main mash to raise the temperature to a step point required, this can then be repeated (double decoction, triple decoction etc) to further increase malt character you’re extracting from the grains.
This process results in aromatic substances being formed that benefit the finished beer, helping lagers achieve a crisp, dry, malty character. But there are disadvantages for brewers such as the inactivation of enzymes, high energy and labour costs. After some time maltsters were able to produce better modified malt, so the need for decoction decreased and, as is common in most breweries today, brewers switched to a less intense and more energy efficient infusion mash schedule.
However, despite widespread availability of well modified malt many German breweries still perform a decoction mash, why is this? For me the quality benefits to the beer are evident. ‘Ah’, I here you say, ‘I can just use melanoidin malt to mimic the effect of a decoction mash…’ sort of, but unfortunately a true decoction mash also creates low level polyphenol extraction which imparts certain characteristics in the beer that cannot be mimicked by using melanoidin malt.
My question then was, can I do a decoction with a Grainfather? Answer – Yes! Here’s how;
RECIPE
I’d previously propagated the Schlenkerla lager strain from a bottle of Schlenkerla Fastenbier so for this brew I decided I’d do a smoked helles in the mould of Schlenkerla helles; so I used:
3.5kg Pilsner malt
200g Acidulated malt
450g Beach smoked malt
DECOCTION CALCULATIONS
First question, what temperatures to hit? I did a single decoction so ordinarily I’d do this to hit my mash out temperature of 75°C but I thought I’d be a bit kinky and do a protein rest at the higher end (55°C) to enhance head retention and mouthfeel. I then pulled a decoction and added it back to raise the temperature to 65°C for my saccharification rest.
The equation for calculating decoction volume required is shown below:
Decoction volume = Total Mash Volume* x (Target temperature – Start temperature) / (Boiling temperature – Start temperature)
*It’s important that the total mash volume is calculated as if the wort surrounding the grain basket were part of the mash.
My total mash size was 23.64 L and my starting mash temp was 55°C with a step up to 65°C. Therefore:
Decoction volume A = 23.64 * (65 – 55)/(100-55)
Decoction volume A = 5.25 L
DECOCTION MASH PROCESS
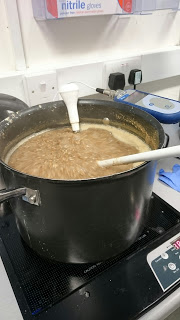
You need to pull the thickest part of the mash to do a decoction, it’s not good enough to take the liquid off the top, you need to be getting the thick hydrated grains and be boiling that. To do this I used a ladle to scoop this out from the centre of the grain bed.
After transferring my decoction volume to a separate pot I then gradually raised the temperature (while continuously stirring) to a saccharification temperature of 65°C and held it there for 25 minutes, it’s important to do this to convert the starches in the grain to fermentable sugars before boiling them.
I then raised the temperature to a boil and boiled it for 20 minutes, and then added it back to the main mash ensuring it was thoroughly mixed so that the main mash temperature was raised to 65°C.
I then continued with my brewday as normal and the lager is now fermenting away happily in the chiller. From start to finish the whole brew day took 5 hours and that included a 90 minute boil as well as the clean up afterwards, not a bad result given the massive increase in quality to the finished beer.”
Try a decoction mash on your next lager brew and let us know how you get on!