Mashing at it’s most simple is the mixing of crushed malts with water at a chosen temperature. In ‘Brewing; science and practice’ the purpose of performing a mash is described as being ‘to prepare wort of the correct composition, flavour and colour in the highest practical yield and in the shortest time.’ Essentially what you’re doing in the mash is creating optimal conditions for enzymes to attack the starch present in the grain. The enzymes break the starch down into sugars which are then rinsed from the grain in the process known as the ‘sparge’.
For all grain brewers, the majority of the time all of the sugar that the yeast will eventually convert into alcohol is created via this mashing process. For the partial mash brewer however you are just getting a portion of these fermentable sugars for your wort from grains and using malt extract and brewing sugars to provide the rest. The quality of malt extract has improved enormously since the days of budget, pharmacy kits and now many partial mash brewers are brewing award winning beers.
So why would you choose to do this?
There are many reasons that you may decide to brew partial mash, not least of which is that it’s a perfect stepping stone for people who want more control over their beer than they get with a kit but aren’t ready or don’t have the time to make the jump to all grain brewing.
You may be a malt extract brewer wanting to create a clone of a commercial beer and the recipe requires using unmalted grains such as flaked wheat. These grains do not have the enzymatic power to self convert and so need to be mashed with base malts to convert their starch to sugar so a partial mash is required.
Or you may want to use a malt which you can’t buy as malt extract – the choice of quality malt extracts continues to improve drastically but there are still occasions where you may want to use a base malt that simply isn’t available in malt extract form. With a partial mash, you don’t have to compromise on the malt flavour you use in your beer.
And sometimes you might want to make a beer without having to do a full 4-5 hour brew day which is where partial mash can be a real advantage.
So how do you do a partial mash?
Step 1: Steeping
- Pour all of your grain into your grain bag.
- Tie a knot in the top of the grain bag to secure. Ensure you do not tie the bag too tight and there is enough room for the grain to move about inside the bag.
- Add 11L (2.9 US Gal) of water to your 20L (5.3 US Gal) pot and place on the stovetop, or you could use the Grainfather as the heating vessel.
- Place your grain bag into your pot. Prod and poke the bag thoroughly to ensure the grain is evenly soaked through.
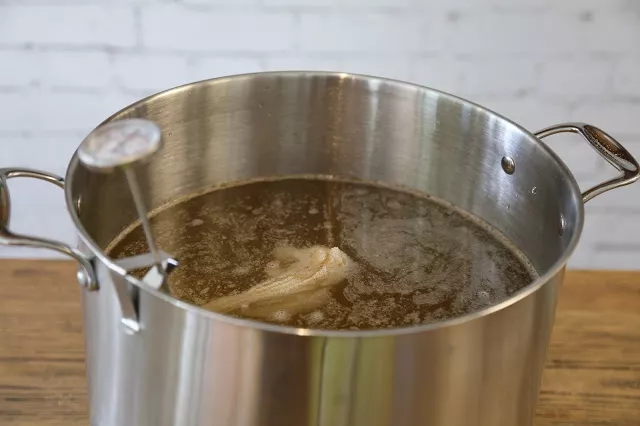
- Begin to heat your water to 65°C (149°F). Once you reach 65°C (149°F) set a timer for 30 minutes.
- During this 30 minutes, pay close attention to the temperature while stirring gently. You should aim to keep the temperature at approximately 65°C (149°F). Apply heat when necessary and turn off the heat if it starts to go higher.
- After 30 minutes, lift your bag out of the pot. Hold it above the pot and allow it to drain (this should take approximately 1 minute). Do not squeeze the bag. You may like to hang this up on something above the pot to drain. Once the grain bag is drained (stops dripping), remove completely and discard grain.
- Pour your malt extract into the wort in the pot. Stir thoroughly to prevent this from scorching on the bottom while you add it.
- Heat and bring the liquid to the boil.
- As soon as the boil begins, add your bittering hops. Adding hops when the liquid is boiling can cause vigorous frothing. To reduce the risk of spilling you can take your pot off the heat as you add these.
- Set a timer for 60 minutes and allow the wort to boil vigorously.
- Add your bittering hops at the start of the boil.
- Once the full 60 minutes is up, take your pot off the heat and add your aroma hops. Allow this to stand for 30 minutes.
- While the boil is going on, clean and sterilise your fermenter, lid and mixing paddle.
- Place your pot in the sink and run cold water around the outside of the pot to cool it down to approximately 50°C (122°F). Ice cubes can also be added to the water around the pot to speed up the cooling time.

- Once at approximately 50°C (122°F), pour your beer into your sanitised fermenter. There will be hop sludge (trub) at the bottom of the pot, try to avoid pouring this.
- Top your beer up to 23 L (6 US Gal) with cold water.
- Stir well with your sanitised mixing paddle and check the temperature (making sure the thermometer probe has been sanitised). Once the temperature is below 26°C (79°F), rehydrate your yeast and add this to the beer.
- Place the lid on your fermenter and seal fully. Push your airlock bung in the lid and half fill with water or some left over sanitiser solution. Allow your beer to ferment for 1 week.
- After 1 week, or when the airlock has stopped bubbling, check the Specific Gravity (SG) using a hydrometer. If the gravity reading is stable over two days then fermentation has finished and you can proceed to bottling.
Have you used your Grainfather for partial mash brewing? How did it go? If you are looking for inspiration we have just launched a new range of Mangrove Jack’s partial mash kits which are perfect for experimenting with, available from most homebrew stores.