


Recipes
BREWING A CHRISTMAS ALE
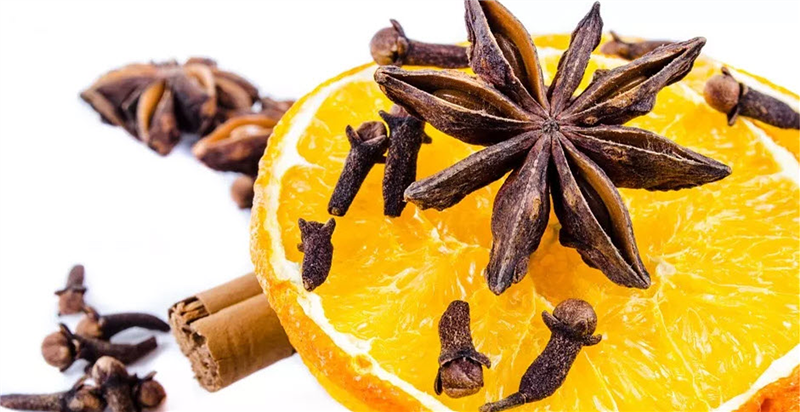
Christmas Ales (or ‘Winter Seasonal Beers’ as they are classified by the BJCP) are a great style to brew when the weather starts to turn cold and you need something strong, warming and full of complex flavours to get you in the holiday spirit. These beers are designed to be aged so they are deliberately created with higher ABV, fuller-bodied and complex taste profiles. This allows the brewer to make beer a few months before Christmas, safe in the knowledge that when they come to drink them, they will be well rounded, boozy winter warmers. Christmas ales can cover a variety of base styles. Many examples are spiced so the base beer should be able to carry the flavours well. A beer with a full body and a higher alcohol content is true to style so some Belgian styles can work well or else specialty dark beers. The joy of brewing a Christmas ale is that it gives the brewer a lot of creative freedom – there’s no ‘right’ way to brew a Christmas ale so it’s a style you can have some fun with. We find it easiest to start with a concept, something that reminds you of the holidays. This might be Christmas pudding, gingerbread, fruits, desserts or anything else that you decide. Once you have your base beer and your concept it’s time to decide what adjuncts you will need. Try and remember that if you decide to do a ‘Christmas pudding ale’ it doesn’t actually need to have Christmas pudding in it (although you could try adding this to the mash if you really wanted?) but instead you should be selecting flavours that are reminiscent of Christmas pudding so that when someone drinks your beer it is drinkable, enjoyable and they can pick out the flavours of Christmas pudding. A good rule of thumb for adding flavours to beer is to always remember it should be a beer first. So let’s take a look at putting a Christmas beer together. Firstly, our concept. We prefer the more traditional ‘winter warmer’ style so we wanted the base style to be something malty and full-bodied. A strong Scotch ale would work well. A well-brewed example of the style is malt forward and caramel flavoured with an aroma of breadiness and biscuit. A nice, fairly sweet finish combined with the malt character makes this a good beer choice for a dessert-inspired beer and won’t require too many additions. Cinnamon, nutmeg and cloves have that traditional Christmas dessert feel that we’re after. Cinnamon in particular has that lovely sweet and slightly woody flavour that will compliment the beer well. Clove and nutmeg should be used sparingly though. Cloves in particular contain an oil that numbs the tastebuds and nutmeg contains the same oil whilst being potent and sweet. Traditionally spices are added in the last few minutes (5-10) of the boil but you may also choose to add them during fermentation. Adding at fermentation may mean placing in a hop bag but this can be a bit of a nightmare, particularly with crushed spices and powders. An easier way is to put the spices in a glass jar with enough vodka to cover them. Leave the spices in the vodka for between 4 to 6 days, shaking daily, before adding to the fermenter through a sanitised strainer (ideally with some filter paper in the strainer). As the spices we’re using are quite potent, we’re using 1/4 teaspoon of Cinnamon, 1/8 teaspoon of nutmeg and 1/8 teaspoon of clove. With spices, start low as they can easily overpower your beer. There is a little bit of trial and error involved here but it’s usually easier to add more flavour than to take flavour away. If you are using fruits or parts of fruit such as bitter orange peel then again these can be added during the boil or to the fermenter. You can go a little bit higher on fruits to get the flavour profile you are after. Our preferred method for adding fresh fruit flavour is to freeze the fruit first (bursting the cell walls and allowing more flavour to be extracted) before heating the fruit to around 80°C (176°F) and holding it there to pasteurise the beer. Mash the fruit into a puree before allowing it to cool to the same temperature as your beer. Add the fruit to a sanitised fermenter before syphoning your beer directly on top. Any sugar additions, including things like honey or molasses, can be added in the last few minutes of the boil. Some brewers like to add this at packaging but be careful if doing it this way as adding extra fermentables at bottling can be a bit risky. So, a strong scotch ale with cinnamon, clove and nutmeg. Here is what our recipe looks like; OG: 1.091 FG: 1.023 ABV: 8.93% IBU: 25.34 SRM: 16.10 BU/GU: 0.28 Boil Time: 90 minutes Fermentables 7kg Maris Otter (87.3%) 0.45kg Crystal 40L (5.6%) 0.35kg Munich (4.4%) 0.18kg Crystal 120L (2.2%) 0.04kg Roasted Barley (0.5%) Total: 8.02kg Hops 40g East Kent Goldings 25g Fuggles Mashing in for 90 minutes at 68°C (154°F) will help to create a sweeter, more full-bodied ale. Combined with the increased melanoidins from an extended boil and the different specialty malts this should be a big, boozy, malt-forward ale. We will add the tincture to the fermenter once primary fermentation is done and allow it to sit in the fermenter for 3-4 days before bottling. Overall the finished beer should be warming, boozy, sweet and full of flavour but overall well balanced. A great Christmas ale!
Learn more
BREWING A LAGER
Brewing a Lager Style Beer Though lagers are how many of us got started with our love of good beers, the amount of homebrewers who actually brew lagers, compared to ales, is relatively small. Why is this? Lager brewing requires the ability to control your fermentation temperature, and the more accurately you can control fermentation temperatures the better your end results will be. For many brewers, this means building a dedicated fermentation chamber with temperature control which can be an off-putting project for some. Other techniques which are more widely available, such as ice baths, can yield good results but can make it difficult to maintain accuracy and repeatability going forward. Another issue with lager brewing is the patience required. Ales are ready relatively quickly in comparison to lagers which can undergo lagering periods of 12 weeks or more. This ties up a fermenter and your fermentation chamber for a significant period of time which can be off-putting. Lastly, lagers are a very technical style of beer to brew. Though many craft beer drinkers may prefer highly hopped, or sour, or smoked beers it actually takes a high level of proficiency to brew a lager well, right from recipe formulation and throughout fermentation and packaging there is a lot to consider to make the clean, crisp and well-balanced beer people expect when you serve them a lager. We spoke to Dave in our UK office who gave us his tips for brewing a lager at home. ‘Brewing a lager can be a huge accomplishment as a home brewer. It requires very precise control over several aspects of fermentation and unlike many ales where some dry hopping or fruit additions can cover a multitude of sins, lager brewing leaves the brewer very much exposed. The clean and balanced profile leaving very little margin for error. As homebrewers, we shouldn’t be put off, however. Yes, lager brewing requires some technical know-how and some precise process control but as long as you follow some simple steps, a great lager is by no means out of reach. Malt Bill For most styles of lager your malt bill is going to consist largely of good quality pilsner malt or possibly 2-row or lager malt. Depending on your water chemistry you may need to make adjustments to your pH and acidulated malt is a good option for this (especially if making authentic German lagers). If this is required, 1% of acidulated malt will reduce mash pH by 0.1. Depending on style you may wish to add some specialty malts for bread crust/malt flavours such as Melanoidin, Munich or Vienna. Some brewers will also choose to add light caramel malts to their grain bill which can work well but should be avoided if making a Pilsner. Carapils can also be an excellent addition to lager styles to help with head retention and body – less than 10% of the grain bill should be sufficient. In a lot of American style lagers, adjuncts such as corn and rice are used. They provide starch in the mash which is broken down into sugars but does not affect the end flavour of the beer (or their contribution is minimal). Water In many instances, a low sulfate level is desirable for making good lagers. Many homebrewers who brew lagers will start with distilled or reverse osmosis water and then make salt additions, in particular calcium carbonate, sodium chloride or calcium chloride. Gypsum (calcium sulfate) additions are usually wrong for the style. With sulfates, levels of below 150ppm are desirable. The water profile for a light lager may look like this; Ca 35 – 55 Mg 0 Na 20 – 35 CO3 0 SO4 85-135 Cl 35-55 And for a Pilsner; Ca 7 Mg 2 – 8 Na 2 CO3 15 SO4 5 – 6 Cl 5 And a bock; Ca 55 – 65 Mg 0 Na 40 – 60 CO3 60 SO4 35 – 55 Cl 60 – 110 Hops There are many hop varieties that are traditionally associated with lagers. Saaz is typical for Czech pilsners and in classic examples will be the only variety used. In German-style lagers, hops such as Hallertauer or Tettnang are common and in American style lagers, Mt. Hood and Liberty are good choices. As always you should feel free to play around with hop varieties and additions and are in no way constrained to strictly following style guidelines but if you are aiming to stay true to style then typically lagers are lightly hopped, malt-forward styles (other than Pilsners which typically have a much larger bittering addition and a BU:GU ratio of around 0.80). Of course, there are variations on style and many breweries now produce hop-forward craft lagers or India Pale Lagers which can be an interesting take on the beer. Yeast As a standard rule of thumb, lagers need around twice the amount of yeast that an ale of a similar gravity would need, or to be more specific, around 1.5 million cells per millilitre of wort per degree plato. If you are pitching dry yeast this simply means pitching twice as much yeast as you would normally. If you are using liquid yeast you will need to grow up a large starter of around 3-4 litres and as you grow the starter, slowly reduce the temperature until it is close to your pitching temperature, so you might start your yeast starter at 18C/64F but by the time you ramp it up to 4 litres it should be between 7-9C (45F-48F). Many homebrewers choose to pitch warm because it can result in a shorter lag phase and means less yeast is required however, a warmer pitching rate will lead to greater production of esters, fusel alcohols and diacetyl which are undesirable in most lager styles to any great degree. With most lager styles, the fermentation profile is very clean although some diacetyl or light yeast esters can be acceptable. The production of these flavours is largely controlled through the brewing process. The Fermentation There are many different approaches to fermenting lagers, all of which can produce good results so if you have a process that works well for you it is fine to stick with it. This is just a simple step by step process for a typical lager fermentation; Once you have completed your brew, chill the wort down to around 8 or 9C (46.4F -48.2F). If you are using a yeast starter you should have grown this to a sufficient level prior to pitching. Pitching cold can increase lag time. The colder temperature enables the beer to absorb more CO2 before it is pushed out of suspension, creating the krausen so if you do not see signs of fermentation as soon as you would expect based on your ale brews, don’t panic. Allow primary fermentation to take place. As best as possible keep the temperature between 9-11C (48-52F) or within the range recommended for your chosen yeast strain. At these temperatures primary fermentation is likely to take longer than usual so expect this to last between 3 and 4 weeks. After primary fermentation, transfer your lager to a secondary fermenter being careful to minimise oxygen pick up. This begins the lagering phase which refers to an extended period of cold storing. This phase can last from two right up to twelve weeks. This clears up the beer, both in terms of appearance and flavour. Solids will drop out of suspension leading to a brighter looking lager and diacetyl produced during fermentation should be cleaned up by the yeast. As lagers undergo extended periods of time in fermenting vessels when it comes to bottling your lager you may wish to pitch a small amount of extra yeast to ensure the beer carbonates properly. Other Considerations for Brewing Lagers In a lot of instances when brewing a lager you are aiming for a light and crisp beer. To achieve this, either mash at the lower temperature end (65c/148F) or mash very low (62C/144F) and then ramp up the temperature to 69C (156F). This two-step mash ensures you target both alpha and beta amylase, resulting in a more fermentable wort and a lighter bodied beer. DMS (dimethyl sulfide) can be present in a lot of lager styles to some extent but in any great quantity it is considered an off flavour. Unfortunately, pilsner malt and other very pale malts contain high levels of the pre-cursor to DMS which can impart a creamed corn type flavour into your lagers. To avoid this you should boil your lagers vigorously and uncovered for 90 minutes. Diacetyl is another off flavour that is naturally produced by yeast as part of the brewing process. Yeast will naturally reabsorb diacetyl towards the end of fermentation but this can be a slow process when you are fermenting cold. To help with this, many brewers will raise the temperature of their beer to between 18-20C (50-55F) for the last two days of fermentation to help clean up diacetyl before lowering the temperature again for the lagering phase.’ So there you have it, some tips for creating a recipe for a lager and how to brew one successfully.
Learn more
BREWING A BARLEYWINE
Although they seem to have dropped in popularity recently (with the rise of craft brewers making ‘Imperial’ or ‘Double’ versions of almost every style now), for us barleywines are still one of the kings of beers. They are the beer world’s equivalent of the single malt whisky or vintage wine. A bigger, more potent, malty, powerhouse of a beer, they were the original ‘turn it to eleven’ style and definitely still deserve a lot of love. As a style, however ‘barleywine’ remains a little undefined. The roots of the style appear to have come from a time when partiglye brewing was the norm – that is, making a batch of beer and using the first runnings to create a strong, high ABV beer and then sparging again to create a second and even third, smaller, ‘table’ beer. With the advent of the hydrometer, brewers were able to calculate the ABV of their beers which in turn led to them being taxed based on the strength of the beer they were producing. This led to a decline in popularity amongst these strong ales and a move towards more ‘sessionable’ brews. As style definitions started to become more prominent, barleywine has not been helped by the fact it has a lot of similarities to old ales and imperial IPA’s and that it is also split into both American and British variations. Also, despite there being a clear ABV range defined by the BJCP, we see commercial beers called barleywines that fall outside of this scale on both sides. Barleywine has become synonymous with ‘strong’ beer and has then been outcompeted by Imperial IPA’s which play on people’s love for anything IPA. As a brewer though a really good barleywine tests a lot of elements of your brewing process. Getting a reasonable efficiency for a beer that requires so much malt can be tricky and when making a beer where the malt character is a key component it can be tempting to try and include all kinds of weird and wonderful specialty malts. Truly great barleywines however can be made with nothing more than pale malt. Oxygenating your wort will be of vital importance, as will proper pitching rates and creating a healthy yeast starter. Then fermentation brings its own set of issues. Getting decent attenuation in a beer of this strength can be difficult, as can finding a yeast that will cope in such a high gravity wort. Yeast selection will be extremely important as ester formation in the American version is not a big part of the style so you need a yeast that can ferment high gravity without becoming stressed and producing high amounts of flavour compounds. In British Barley Wines, some fruit esters are acceptable. If you are making a darker barleywine these should be towards the dark fruit end of the spectrum whereas pale Barley Wines should have lighter esters when present. Barleywines require a lot of malt which takes up a lot of space in any system. Most people will probably find it easier to brew a smaller volume if you are looking to make this style from grain only. You could also partigyle or reiterated mash, use malt extract to help reach your gravity or boil your wort for longer to create a more concentrated wort (or any combination of these techniques). As mentioned above, a great barleywine can be made with just a flavourful base malt such as Maris Otter but you may choose to include Vienna, Munich or a small amount of cara/crystal malts to add some more malt complexity. There really is no need to do anything too complicated with the recipe though, you should be using such a high proportion of malt that you won’t risk lacking malt character regardless. For your hop additions, this is predominantly what defines either a British or American version of the style (there are some other differences but hop choice is the big one!). If you are brewing a British Barley Wine then go with traditional British hops – think Fuggles or East Kent Goldings. IBU wise you are looking for between 35 and 70 depending on the start gravity of your wort but make sure you consider balance – your BU:GU should be around 0.52 for this style. For an American Barleywine anything between 50 – 100 IBU’s is acceptable and the BU:GU balance should be closer to 0.8-0.9. As for your hop choices for the American variety the guidelines accept anything citrusy, fruity or New World so don’t feel restricted in your choices here but classic American hops (the three C’s and Amarillo for example) work well. Even though the hop character in the American variety is more assertive but there should still be a rich malt character. Here’s our recipe for a classic American style barleywine with some tips on how to mash in effectively for a beer of this size; Bigmouth Strikes Again (https://community.grainfather.com/recipes/16379) So there are our tips for brewing a barleywine. They are big beers and as with all big beers they come with their own unique challenges but brewing the style well is always rewarding.
Learn more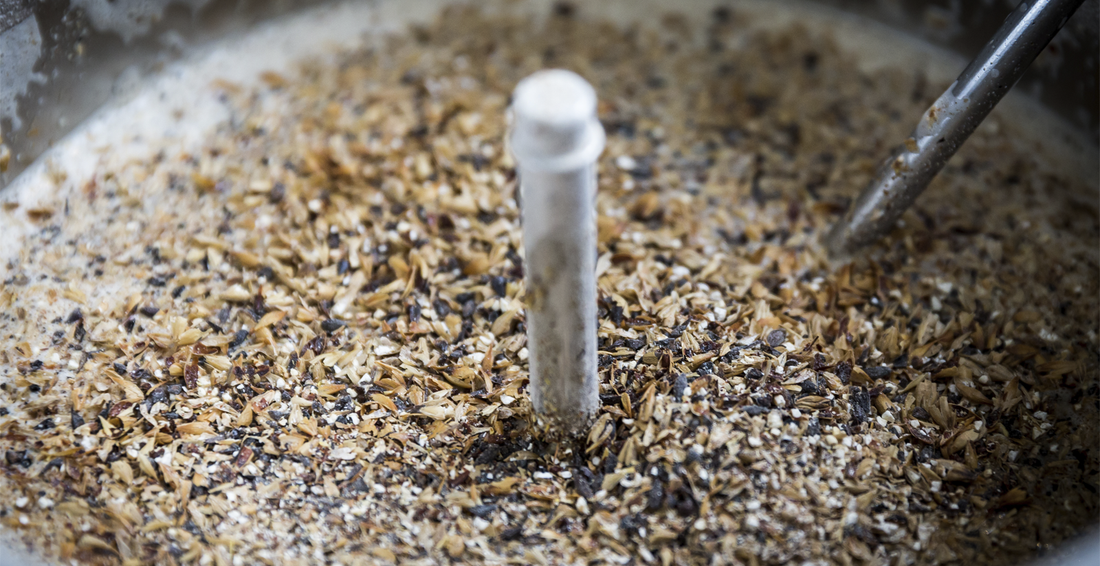
BREWING A GRUIT
Dave from our UK site decided it would be a good idea to brew a beer without hops… Repeat, WITHOUT HOPS! “Ridiculous idea” I hear you say. Probably, but maybe not. Read below to find out what he learnt when brewing a ‘Gruit’. Hops to many, are one of the four fundamental ingredients of making a beer. However, this was not always the case. Up until the 16th Century, popular styles of beer were brewed without hops and instead used a mixture of herbs and spices to produce the aromas and bitterness that hops provide in most modern beers. These no hop beers are known as Gruit Ales. I wanted to try and create my own version of a beer that was brewed without the use of hops, as I was curious to see if it was possible to get that balanced bitterness and great aroma using herbs and spices. I decided to go for a simple, dark-ish ale that I felt would carry the herbs and spices well. It’s a bit of a mish-mash of grains as I wasn’t really aiming for any particular style but a bit of reading suggested that a good amount of dark malts helped to add bitterness to the beer that would typically come from the hop addition; 4.9 kg Munich0.70 kg Carafa III0.42 kg Dark Crystal0.31 kg Carawheat For my spice mixture I decided to add; 28 g juniper berries to bitter @ 60 minutes5 g tarragon, 13 g mint and 27 g rosemary for flavour and aroma @ 0 minutes After the herb and spice additions, there was a strong aroma akin to a lamb roast dinner emanating from the Grainfather so I was quite worried about what the final beer was going to taste like. There are some pictures from the brew day below; The fermentation was extremely vigorous, dropping from 1.060 to 1.026 in 2 days and blowing through the airlock; TASTING NOTES; Tasting the beer was interesting. The smell wasn’t bad, quite herby but with a little bit of coffee aroma coming through and the colour was great; deep black with a tan head that was quick to dissipate. Unfortunately, the flavour was unbalanced and confused. The mint was massively overpowering and the combination of herbs made it taste almost like a sour beer. The flavours just did not work well together. That said, there were no faults (apart from being overly herbed) with the underlying beer and there was a bitterness that I wasn’t expecting to get without hops in the beer. I think the major issue was that I was a bit too aggressive with my flavour additions and hadn’t really thought about how they would work in a beer, but I like to do things to extremes in my experiments to see what’s possible. So the conclusion is that it is possible to make a beer without hops but the key to making one successfully is subtlety and a good knowledge of flavour combinations. If you really want to try making an authentic ‘Gruit’ there are great resources available at: http://www.gruitale.com/intro_en.htm” – David
Learn more
MAKING MEAD
Honey, while is high in fermentable sugars but is low in minerals and nutrients, coupled with the mild antiseptic properties makes honey solution tougher for the yeast to ferment than fruit juice and wort. Therefore, more work is needed during the fermentation process to ensure the yeast is happy healthy to carry out fermentation. Traditional Mead When selecting honey for a traditional blended mead, a large portion of the honey used should be non-descript honey (liquid honey) which will keep the costs down to add complexity add a small portion of specialty honey (Bush, Manuka, orange blossom). The honey is diluted with warm water to make the musk. There are many yeast strains available for mead, and these can be liquid or dry yeasts. Liquid yeasts will require a starter and nutrients, and dry yeast will require rehydration and nutrients before pitching. Nutrients will also be needed during the fermentation to ensure healthy cell growth and fermentation. I use the TONSA 2.0 method for fermentation and nutrients for my meads the calculations for this can be found on the mead made right website. However, there are many other ways to add nutrients to the ferment. Dry Wild Flower Mead Stats: Volume 19L (5 Gal) OG: ~1.069 FG: 1.000 +/-0.005 1/3 SG: 1.046 Est ABV: 9% Equipment: Fermenter 25-30L (6-8gal) Sanitiser Hydrometer 250ml container Larger container for water bath Thermometer Aluminium foil Stainless steel or plastic mash paddle Ingredients: Liquid Honey 5kg (11lb) Wildflower Honey 0.45kg (1lb) Non-chlorinated water 20L (5.28gal) Fermaid O 18.14g (0.65oz) Mangrove Jacks M05 mead yeast 12g (0.42oz) two packets could be used Go Ferm 15g (0.53oz) Please note that when using honey the number of SG points added by an amount of honey will vary from honey to honey and season to season. Process: Clean and sanitise all equipment Rehydrate yeast a) Allow the yeast to warm to room temperature b) In a sanitised container prepare a small amount (10ml/g of yeast) of sterile non-chlorinated water use a water bath of either boiled or cold water to get your yeast water to 30-400C c) Add 15g (0.53oz) Go Ferm stir until dissolved d) Sprinkle dry yeast over the top of the water trying to avoid any large dry clumps let sit for 15 mins loosely covered with aluminium foil to avoid foreign matter and wild yeast falling in the yeast, then stir gently e) Gently stir again to form a cream then let sit for another five mins covered f) Ensure the temperature of the cream is within 80C of your Must g) Pitch the cream into the fermenter ideally as soon as possible Dilute honey into 10L (3 gal) of warm < 550C (1310F) water in the fermenter Fill fermenter with water to 19L (5gal) volume Pitch yeast and ferment in low 160C (620F) Follow TOSNA nutrient addition schedule a) Add 4.54 g Fermaid O 24-hours after yeast pitch. b) At the 48 and 72-hour mark add 4.54 g Fermaid O. c) The final nutrient addition of 4.52 g Fermaid O is on the 7th day after yeast pitch or when fermentation has reached its 1/3 sugar break (SG = 1.046), whichever comes first. Degas twice a day by stirring the Musk gently until 1/3 sugar break to release CO2 Once fermentation has ceased, rack to secondary Age until clear or add clarifying agent Keg or bottle mead This recipe could be made semi-sweet or sweet by adding non-fermentable sugar at step 8. Fruit Meads Fruit and honey go together as well as, well fruit and honey. Melomels are their name and deliciousness is their game, this week we’ll look at the basic description of these meads and a recipe. Melomel The blueberry apple Melomel or Cyser is a still mead with apple and blueberries giving the final mead a dessert wine character but with less body than a traditional dessert wine. Blueberry Apple Melomel Stats: Volume 19L (5 Gal) OG: ~1.081 FG: 1.000 +/-0.005 1/3 SG: 1.046 Est ABV: 11% Equipment: Fermenter 25-30L (6-8gal) Sanitiser Hydrometer 250ml container Larger container for water bath Thermometer Aluminium foil Stainless steel or plastic mash paddle Medium, fine mesh grain bag for fruit Ingredients: Liquid Honey 3kg (6.61lb) Mangrove Jacks Apple Cider pouch 2.4kg (5.29lb) Frozen Blueberries 1kg (2.2lb) Non-chlorinated water 20L (5.28gal) Fermaid O 10.6 (0.37oz) Mangrove Jacks M05 mead yeast 12g (0.42oz) two packets could be used Go Ferm 15g (0.53oz) Please note that when using honey the number of SG points added by an amount of honey will vary from honey to honey and season to season. Process: Clean and sanitise all equipment Allow the bag of blueberries to thaw Rehydrate yeast a) Allow the yeast to warm to room temperature b) In a sanitised container prepare a small amount (10ml/g of yeast) of sterile non-chlorinated water use a water bath of either boiled or cold water to get your yeast water to 30-400C c) Add 15g (0.53oz) Go Ferm stir until dissolved d) Sprinkle dry yeast over the top of the water trying to avoid any large dry clumps let sit for 15 mins loosely covered with aluminium foil to avoid foreign matter and wild yeast falling in the yeast, then stir gently e) Gently stir again to form a cream then let sit for another five mins covered f) Ensure the temperature of the cream is within 80C of your Must g) Pitch the cream into the fermenter ideally as soon as possible Dilute honey and cider pouch into 10L (3 gal) of warm < 550C (1310F) water in the fermenter Gently break up the thawed bag of blueberries so that most of the berries are broken empty the bag over the fermenter into the sanitised grain bag, tie up the end and add to the fermenter. Fill fermenter with water to 19L (5gal) volume Pitch yeast and ferment in low 160C (620F) Follow TOSNA nutrient addition schedule a) Add 2.6g Fermaid O 24-hours after yeast pitch. b) At the 48 and 72-hour mark add 2.6 g Fermaid O. c) The final nutrient addition of 2.65 g Fermaid O is on the 7th day after yeast pitch or when fermentation has reached its 1/3 sugar break (SG = 1.054), whichever comes first Degas twice a day by stirring the Musk gently until 1/3 sugar break to release CO2 Once fermentation has ceased, rack to secondary Age until clear or add clarifying agent Bottle mead still in wine bottles This recipe could be made semi-sweet or sweet by adding non-fermentable sugar at step 10. Braggot A Braggot is a mead made with malt, think of this as a beer mead hybrid. A harmonious blend of mead and beer, with the distinctive characteristics of both. A wide range of results is possible, depending on the base style of beer, the variety of honey and overall sweetness and strength. Beer flavours tend to mask somewhat typical honey flavours found in other meads. Below is the recipe for a honey Helles in both extract and all grain recipes. A crisp and golden German Helles with a twist. Light and malty with hints of vanilla bean and red fruits, this has been dry-hopped with two New Zealand varieties, Wakatu and Pacific Gem to give it a floral, zesty lime and spicy aroma. Which coupled with wildflower honey will add slightly more dryness to the beer while adding a soft floral taste and aroma complimenting the noble like hops. Hey Honey Helles – Extract version Stats: Volume 23L (5 Gal) OG: ~1.040 FG: 1.005 +/-0.005 Est ABV: 4.6% Equipment: Fermenter 25-30L (6-8gal) Hydrometer Sanitiser 250ml container Larger container for water bath Thermometer Aluminium foil Stainless steel or plastic mash paddle Ingredients: Wild Flower Honey 0.2kg (0.44lb) Mangrove Jacks Craft serries Helles pouch 1.8kg (4lb) Non-chlorinated water 23L (6 gal) 1.2 kg (2.6lb) Pure Liquid Malt Extract or 1 kg (2.2lb) Dextrose/Brew Enhancer Process: Clean and sanitise your fermenter, airlock, lid and mixing paddle with Sanitiser. Remove the yeast (plus hop sachet and other dry additives if included) from the dry compartment of the pouch and set aside for now. Add 3 L (3 US qt) of boiling water to the fermenter, pour the liquid malt extract from the liquid compartment of your pouch into your sanitised fermenter and squeeze out remains. Add either 1.2 kg (2.6lb) Pure Liquid Malt Extract or 1 kg (2.2lb) Dextrose/Brew Enhancer. Add the Honey, then stir until completely dissolved. Top up with cold water to 23L (5gal) Stir well. Check liquid temperature is below 25°C (77°F), if not then stand the fermenter in a bath of icy water to cool it down. Rehydrate yeast i. Allow the yeast to warm to room temperature ii. In a sanitised container prepare a small amount (10ml/g of yeast) of sterile non-chlorinated water use a water bath of either boiled or cold water to get your yeast water to 30-400C iii. Add 15g (0.53oz) Go Ferm stir until dissolved iv. Sprinkle dry yeast over the top of the water trying to avoid any large dry clumps let sit for 15 mins loosely covered with aluminium foil to avoid foreign matter, and wild yeast falling in the yeast, then stir gently v. Gently stir again to form a cream then let sit for another five mins covered vi. Ensure the temperature of the cream is within 80C of your Must vii. Pitch the cream into the fermenter ideally as soon as possible Fit an airlock and grommet or bung to fermenter lid, then secure the lid, making sure the seal is airtight. Half fill the airlock ‘U’ with boiled water that has cooled or sanitiser to protect the brew during fermentation. Leave to ferment at a constant temperature between 18–22°C (68–72°F) below 15°C (59°F) fermentation may stop altogether. Fermenting above the recommended temperature will reduce the quality of your beer. If you have dry hops: After seven days, check the Specific Gravity (SG) using a hydrometer. If the SG is 1.020 (for Dextrose) or 1.025 (for Pure Malt Enhancer), or below, add the hop pellet sachet but DO NOT STIR (the hops will break up and disperse naturally). If the SG is higher than 1.020 (for Dextrose) or 1.025 (for Pure Malt Enhancer), check again in 1 or 2 days until the SG is 1.020 (for Dextrose) or 1.025 (for Pure Malt Enhancer), or below before adding the hop pellets. Replace the lid and leave to continue fermenting with the hops. Once the fermentation has finished, bottle or keg beer and enjoy. Hey Honey Helles – All Grain Version Stats: Volume 23L (5 Gal) OG: ~1.040 FG: 1.005 +/-0.005 Est ABV: 4.6% Boil time: 60mins Mash time: 60mins Mash Temp: 640C IBU: 43 Fermentables: 4.0kg (8.2lb) Pilsner malt 0.3kg (0.66lb) acidulated malt Carahell or Carapills 0.22kg (0.49lb) Wildflower honey 0.2kg (0.44lb) Hops: 6.00 Pacific Jade Pellet Boil 60 mins 60.00 Pacifica Pellet Hop Stand 20mins 60.00 Wakatu (Hallertau Aroma) Pellet Hop Stand 20mins Yeast: 2.0 packets Mangrove Jack’s Bavarian Lager M76 Fermentation: Fermentation 12-14 days 100C Diacytel rest 2 days 160C Lager 5 weeks at 40C
Learn more
JOIN OUR BREWING APP TO DISCOVER BAZILLIONS OF RECIPES OR CREATE YOUR OWN
With so many homebrewing recipes to explore in the app, you’ll be tempted to try something new. Plus, with our unique recipe creator, you can be in command, experiment with ingredients and challenge yourself to master your own creations.