By Clayton Morrison (Fermental Brewing and Grainfather Agent)
“Ok, so for those of you who caught the last blog you should have a good idea of what yeast is and what it does.
This week, we’re going to talk about caring for and getting the most out of your yeast via a starter.
Different yeasts work best at different temperatures which are specified on manufacturers’ instructions and a number of other sources online. Mangrove Jacks yeasts are great for this in particular, as they include all of the information on the back (optimal fermentation temperature, expected attenuation etc).
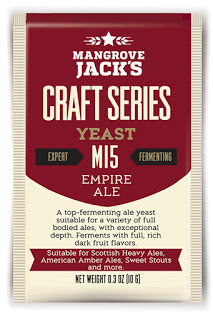 |
| A Mangrove Jack’s Yeast |
A general and very loose rule of thumb that I follow is, a lower fermentation temperature (8-12°C) requires more yeast and a longer ferment time. A higher temperature (16-22°C) generally means a little less yeast (compared to a lager for instance) is required, and fermentation should take place faster. The obvious exceptions to this are high OG beers (barleywines, tripels/quadrupels, imperial styles) and beers fermented at the lower end of their yeast’s temperature range or with an inadequate quantity of healthy yeast.
I refrigerate all my yeasts. Dry or liquid, fresh or recultured – all below 4°C, all the time. Yeast become dormant at cooler temperatures, and thus do not metabolise anywhere near as much as when they’re active.
Now, calculating how much yeast to use is surprisingly simple by utilising tools such as MrMalty – all you need to do is provide enough yeast either by purchasing more, or propagating some using the yeast starter method which is explained below.
Yeast Starter (Equipment) – I mentioned last week about yeast starters. A simple way to increase your cell count is by making a starter. There are many methods out there which vary slightly from one to another – I will outline my method below and another you can use should you not have the required equipment.
1 – Add 1.2 L of tapwater and 50 g of dried malt extract to a borosilicate flask, and place directly onto hob/burner. Boil uncovered for 10 minutes. I generally experience a 20% boil off during this time, and as I sometimes like to ‘step’* my starters I generally start with 1 L of 1.020 OG wort in which to pitch my yeast. (It’s important to make a weak starter rather than a strong one so as to encourage the yeast off to a good start and not have them struggle.)
2 – Cool flask and contents by immersing in cool water in sink. (Borosilicate flasks such as Erlenmeyer and Schott are made to withstand drastic temperature changes.) *Disclaimer* – I always wear safety glasses when doing this, just in case. Still makes me twitch every time!
3 – Aerate the starter by placing it on a stir plate at high rotation for 10 minutes before pitching yeast. Ensure your yeast has come to room temperature by removing it from the fridge for an hour beforehand.
4 – Pitch yeast directly into starter (recultured, dry or liquid, smack pack or vial) and place a loose fitting cap of foil over the top and start your stir plate. A small vortex is all that is needed to keep the yeast in suspension and doing their job.
5 – Try to maintain a temperature above 20°C. Remember – the idea is to grow yeast here, not make beer. Even lager yeasts thrive at high temperatures, however you may want to consider decanting the spent wort off before pitching the yeast into your beer to reduce off flavours in your beer.
I try to pitch the starter into my fermenter when the starter is at high krausen, however life being what it is I often miss high krausen and pitch whenever I have the time available – best practice would be to pitch when the yeast is most active.
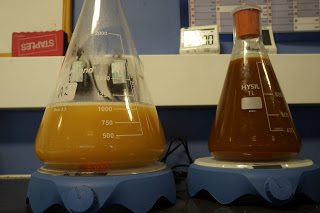 |
| Yeast starters on stir plates |
Yeast Starter (No Equipment)
1 – Sanitise a plastic bottle using your preferred method.
2 – Boil and cool your wort as above, however take care as to not put boiling wort directly into the plastic bottle. Place the pot in a sink of cold water.
3 – Fill bottle 3/4 of the way and cap and shake the bottle to aerate.
4 – Pitch yeast.
5 – Maintain 20°C or higher and intermittently (every time you walk past perhaps) give the bottle a bit of a shake.
* Stepping a starter means increasing the amount of available fermentable sugars by periodically adding more boiled and cooled wort to the starter, typically once the yeast has already consumed the available sugars provided in the first instance. You can crash chill (place in fridge for 24 hours) and dispose of the ‘spent’ wort and re add new wort to the milky yeast layer – best practice would suggest to dispose of the spent wort to reduce off flavours associated with oxygenated beer.
That in a nutshell including last week’s edition is the ins and outs of yeast. Remember, there are many many opinions and other methods both more and less expansive – this is just what I do on a regular basis.
Thanks for reading,